Cesar Luchetti
Department of Implant Dentistry. National University of La Plata. Argentina
Department of Implant Dentistry. National University of La Plata. Argentina
Sinus lift procedures are common in the atrophic posterior maxilla. However they are more or less complicated depending in what approach we decide to use.
In great atrophies, the lateral window approach is often the most indicated, usually associated with ridge augmentation. Although this is a predictable procedure, sometimes we must face some problems. One of the most common is the perforation of the Schneider membrane.
Here we can have basically three scenarios:
1- Small perforation. In this cases, it is normally occluded itself by just raising it.
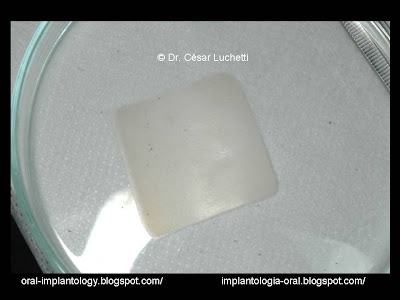
2- Medium perforation. Here we can manage it by using collagen membranes or membranes made of PRP.
3- Large perforation. In these situations, there are usually no possibilities of reparation. The recommendable approach is to clean out the affected Schneider membrane, irrigate the sinus a lot and close the flap. Then, wait at least 3 months and re-enter to do the sinus lift.
In this work we will describe and show how to manage a medium perforation during sinus lift together with a ridge augmentation.
 |
| Preoperative situation. |
 |
Preoperative situation 15 days after teeth extractions. |
 |
Ridge defects are showed after raising the flap |
.
 |
Access to the maxillary sinus and Schneider membrane elevation. A perforation is noticed at the center part. |
 |
| Membrane perforation in a closer view. |
 |
| Collagen membrane. |
 |
Collagen membrane placed to cover the perforation |
.
 |
Graft placed into maxillary sinus and in the ridge defects. In both cases we use Beta Tricalcium Phosphate (spherical in sinus and irregular particles in the ridge) |
 |
PRP covering the graft and collagen membrane over the access window. This is not really necessary in our experience, but we decided to do it just to help this difficult case in particular. |
 |
| Suture |
 |
Postoperative picture, prior to implant placement, showing good bone regeneration. |
 |
Implants in place following a triangular distribution to improve load distribution of the future crowns. Also, a small graft was done to achieve a better contour in the posterior area. |
 |
| Suture |
 |
Healing abutments 10 days after the uncover surgery. |
 |
Definitive abutments in place. |
 |
Metal substructure try in. Notice the depression created in the anterior implant to achieve better esthetics. This was done by compression with the provisionals. |
 |
Definitive crowns. |
 |
| Definitive crowns from a more lateral view. |
 |
Definitive crowns from an occlusal view. |
 |
| Pre and postoperative comparison. |